> ## Documentation Index
> Fetch the complete documentation index at: https://tokenlayer-2a53bba4.mintlify.site/llms.txt
> Use this file to discover all available pages before exploring further.
# MCP Quickstart
> Get started with Thrust MCP server in minutes
## Prerequisites
Before connecting the Thrust MCP server, you'll need:
1. A Thrust account at [demo.onthrust.com](https://demo.onthrust.com)
2. Your API key (see [Getting Your API Key](#getting-your-api-key))
3. An MCP-compatible AI assistant (Claude Code, Claude Desktop, ChatGPT, Cursor, or Windsurf)
## Getting Your API Key
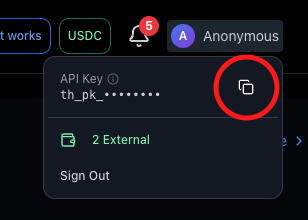
Go to [demo.onthrust.com](https://demo.onthrust.com) and sign in
Hover over your **profile avatar** in the top-right header
Click to copy your API key to clipboard
Keep your API key secure! It provides access to your Thrust account and can execute transactions on your behalf.
***
## Claude Code
Claude Code is Anthropic's official CLI tool. Add Thrust with a single command:
Open your terminal and run:
```bash theme={null}
claude mcp add --transport http token-layer https://mcp-server.onthrust.com \
--header "Authorization: Bearer YOUR_API_KEY"
```
Replace `YOUR_API_KEY` with your actual API key from demo.onthrust.com
Start a new Claude Code session:
```bash theme={null}
claude
```
Try: "Show me trending tokens on Thrust"
Claude Code automatically includes the Authorization header in all MCP requests.
### Example Usage
```bash theme={null}
$ claude
You: Create a meme token called "Rocket Dog" with symbol RDOG
Claude: I'll help you create a token called "Rocket Dog" with symbol RDOG.
What blockchain would you like to deploy on?
1. Base (mainnet)
2. Base Sepolia (testnet)
You: Base Sepolia for testing
Claude: [Uses create_token MCP tool]
Token created successfully! Contract: 0x742d35Cc...
```
***
## Claude Desktop
Claude Desktop supports MCP through a visual connector interface:
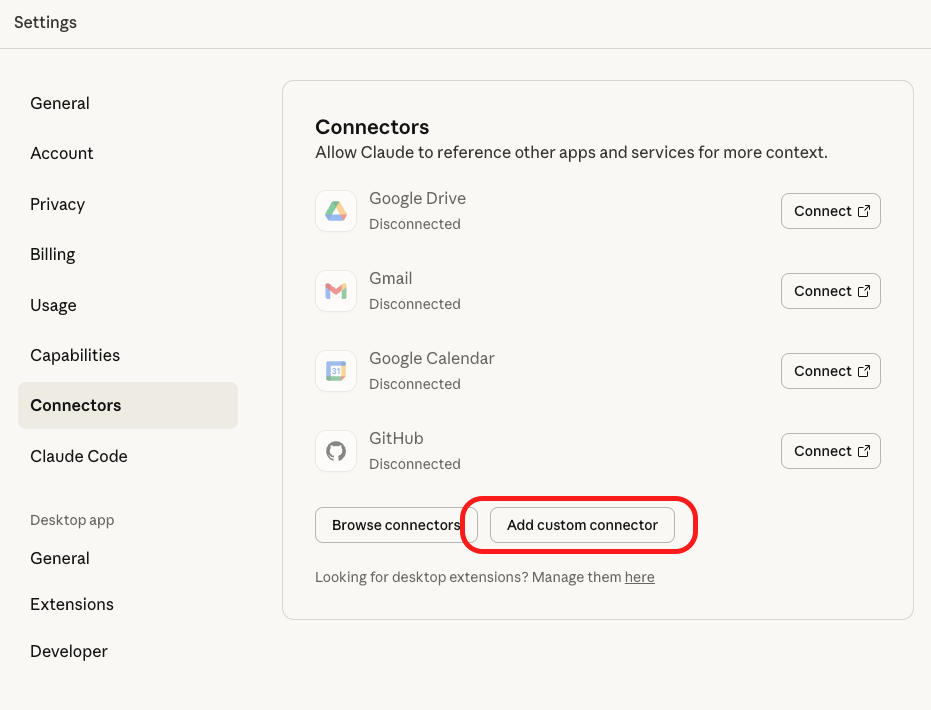
Launch Claude Desktop and click the **Settings** icon (gear) in the bottom-left
Select **Connectors** from the settings menu
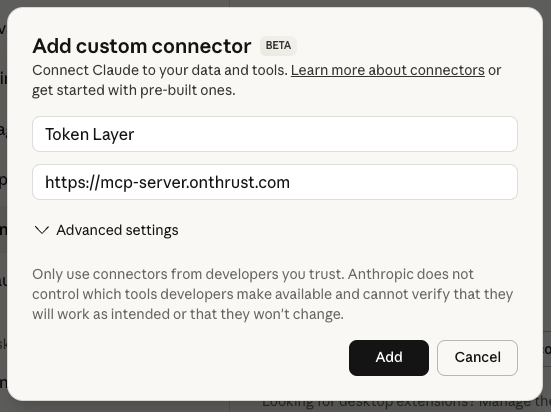
Click **"Add Custom Connector"**
* **Name**: `Token Layer`
* **URL**: `https://mcp-server.onthrust.com`
Click **"Connect"**
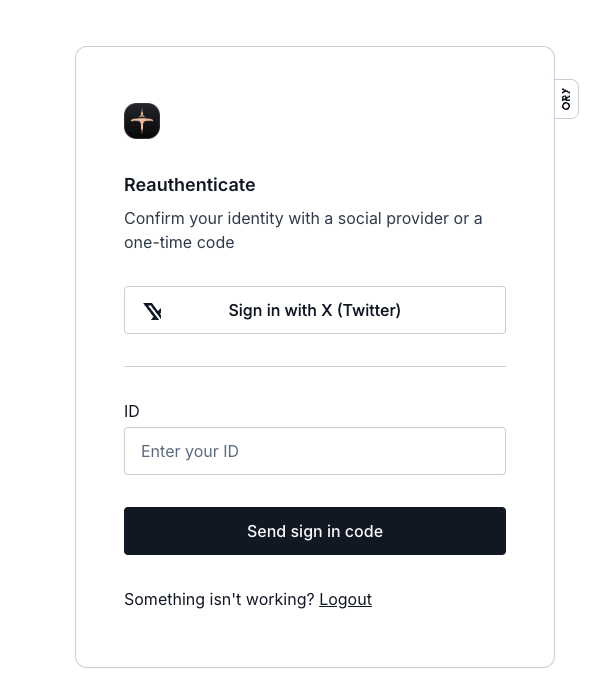
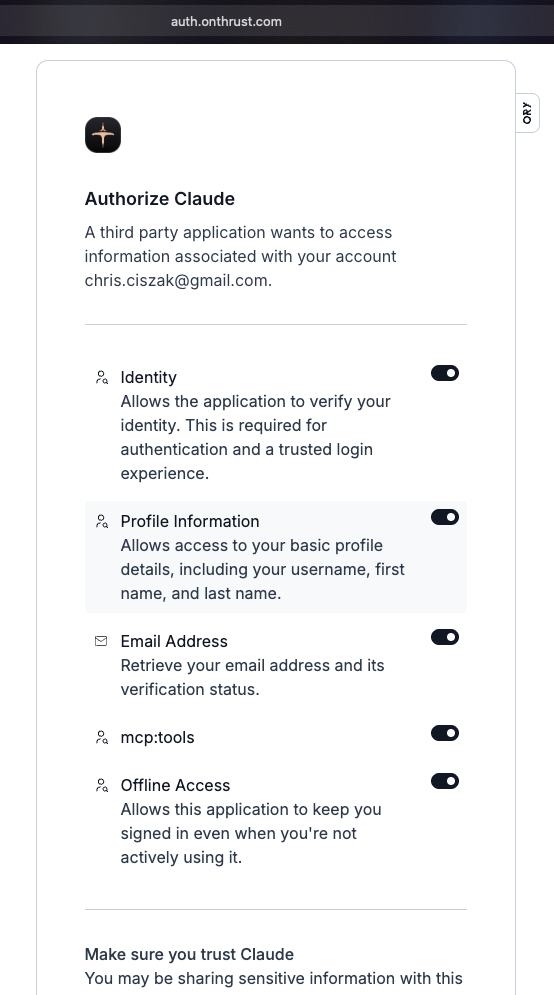
You'll be redirected to authenticate with your Thrust account
Review the permissions and click **"Authorize"** to grant access
### Visual Guide
Once connected, Claude Desktop can use all Thrust MCP tools in your conversations!
***
## ChatGPT
ChatGPT supports custom MCP connectors through a similar interface:
In ChatGPT, click your profile icon and select **Settings**
Go to **Settings → Connectors**
Click **"Add Custom Connector"**
* **Name**: `Token Layer`
* **URL**: `https://mcp-server.onthrust.com`
Click **"Connect"**
Authenticate and authorize access (same as Claude Desktop)
The OAuth flow for ChatGPT is identical to Claude Desktop - you'll authenticate with Thrust and authorize the connection.
***
## Cursor & Windsurf
Cursor and Windsurf are AI-powered code editors with MCP support:
### Configuration
In Cursor/Windsurf, open settings and navigate to **MCP Servers** or **Connectors**
Add a new MCP server with these details:
```json theme={null}
{
"name": "token-layer",
"transport": "http",
"url": "https://mcp-server.onthrust.com",
"headers": {
"Authorization": "Bearer YOUR_API_KEY"
}
}
```
Restart Cursor/Windsurf to apply the configuration
Ask the AI: "What are the trending tokens on Thrust?"
### Alternative: Config File
You can also add the MCP server via config file:
```json Cursor (mcp-config.json) theme={null}
{
"mcpServers": {
"token-layer": {
"transport": "http",
"url": "https://mcp-server.onthrust.com",
"headers": {
"Authorization": "Bearer YOUR_API_KEY"
}
}
}
}
```
```json Windsurf (mcp-config.json) theme={null}
{
"mcpServers": {
"token-layer": {
"transport": "http",
"url": "https://mcp-server.onthrust.com",
"headers": {
"Authorization": "Bearer YOUR_API_KEY"
}
}
}
}
```
Replace `YOUR_API_KEY` with your actual API key. Never commit API keys to version control!
***
## Testing Your Connection
Once connected, try these commands to verify everything works:
```text Token Discovery theme={null}
"Show me the top 5 trending tokens on Thrust"
```
```text Price Check theme={null}
"What's the current price of token with symbol DOGE?"
```
```text Token Creation theme={null}
"Help me create a test token on Base Sepolia"
```
```text Trading theme={null}
"Get a quote for buying 50 USDC worth of token xyz"
```
```text Social theme={null}
"Show me recent posts about DeFi tokens"
```
## Troubleshooting
* Verify your API key is correct
* Check that you copied the full key without extra spaces
* Try generating a new API key from demo.onthrust.com
* Ensure you have internet connectivity
* Check if [https://mcp-server.onthrust.com](https://mcp-server.onthrust.com) is accessible
* Try again in a few minutes (may be temporary server issue)
* Verify the MCP server is properly configured
* Restart your AI assistant
* Check the [Tools Reference](/mcp-tools) for available tool names
* Ensure you have sufficient balance for gas fees
* Check that you're using the correct network (mainnet vs testnet)
* Review transaction details before confirming
## Security Best Practices
Never share your API key or commit it to public repositories
Understand what actions the MCP server can perform on your behalf
Regularly check your transaction history on demo.onthrust.com
You can revoke API keys anytime from your account settings
## Next Steps
Learn about all available tools and their capabilities
Get inspired with ready-to-use prompt examples
Dive deeper into the underlying API
Contact us for help